A lot of people are asking us about an easy way to adjust the color and the exposure of a video. Color correction can be very challenging for beginners who are just learning how to edit. There are more and more plug-ins and tools being released every day to correct and grade videos but one of the simplest effects is the Fast Color Corrector in Adobe Premiere Pro. This tool is not new at all and has been around for a few years now but I think it’s one of the best ways to get started with color correction, exposure and contrast adjustment.
You can watch a short tutorial about the Fast Color Corrector in Adobe Premiere Pro below:
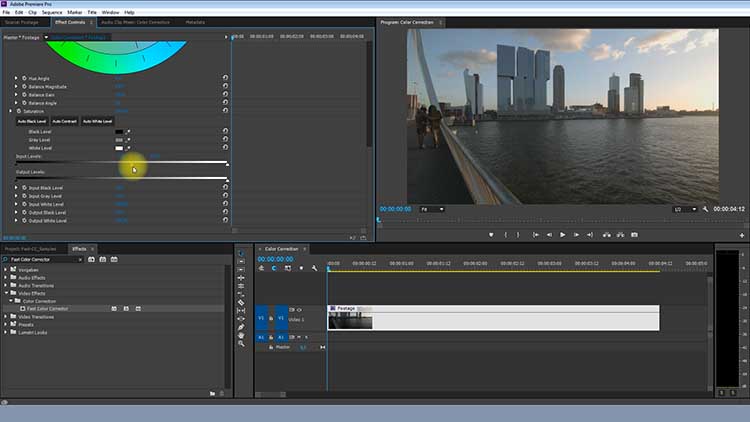
Besides being able to adjust the exposure by sliding the value “Input Gray Level” to the left or right side (1.0 is the original exposure of the edited video) the contrast can also be increased by using the “Input Black Level” and the “Input White Level”. But be aware of the high contrast those values add to the footage. If your video has a high contrast and you want to get a flat look the “Output White Level” (decreases overexposed areas) and the “Output Black Level” as well as the standard Gray Level can help.
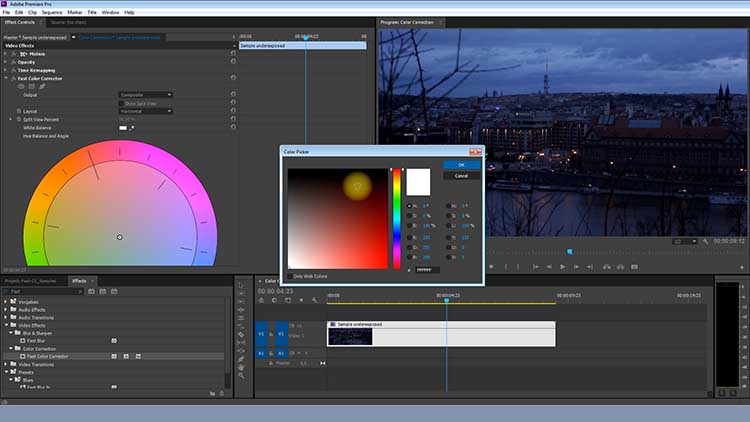
The color and white balance can be adjusted and corrected by moving the little circle around the color wheel. The further the circle is being moved away from the center point and into a color direction the stronger that color tone will become. You can give your clips a purple or green tint if that’s what you are looking for but usually that’s not the correction that is needed. The most common colors will probably be blue and yellow. For example if your video looks to warm and yellow you can shift the color towards blue to make it look more natural or of course the other way around. If the clip looks too cold it’s best to move the color wheel towards a yellow tone.
The Fast Color Corrector is not a magical tool that will turn every kind of video into a perfect looking image but it’s a good way to start if you have never color corrected before. For more advanced editors we recommend the Three-Way-Color-Corrector, Speed Grade or the use of LUTs for example with Lumetri. For all the editors who don’t use Premiere Pro we highly recommend taking a closer look at DaVinci Resolve by Blackmagic Design.
Written by Moritz Janisch


