Night timelapses look unique because of the long exposure shots that are combined in to a sequence that then plays back as a video. Most DSLRs, mirrorless cameras and even phones can do that as long as they have a mode that allows setting the exposure time manually. Video cameras usually can’t do that because they simply can’t expose as long as a photo camera.
You can watch our video tips featuring lots of long exposure timelapses below in Ultra HD:
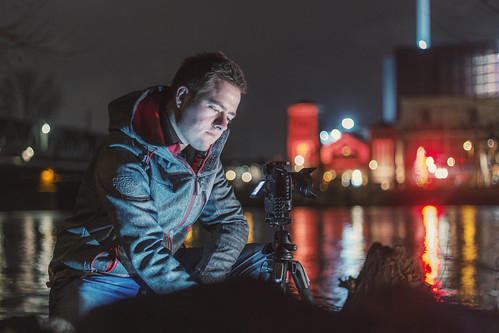
We prefer and recommend shooting city night timelapses in winter because the sun sets earlier than in summer which means it’s already dark in late afternoon and buildings and cars also switch on their lights ealier which is very useful for those long exposure shots. When shooting in the city the best way to show motion is to capture fast moving cars because the back and front lights create these great looking light streaks.
Another reason to shoot in winter is that there are no more leaves on the trees which means you can see through better also revealing more of the surroundings to the viewers.
Depending on how fast the cars are moving you can shoot with a shutter of 1 to 30 seconds. If traffic moves really slowly it rather makes sense to expose long compared to when capturing a highway with fast moving cars. We recommend trying out different exposure times so you can see which works best for each scene. How long to expose also depends on the lens and how close you are to the action. If you’re very close the exposure time can be short compared to when capturing something from a distance.
Below are some long exposure shots captured with the Fujifilm X-T2 in Frankfurt:
These tips apply mostly when shooting timelapses in cities rather than landscape and nature because the focus is on car and window lights that move and change rather than the sky and the stars.
While we always recommend capturing photo timelapses in raw instead of JPEG it’s even more important to do so when shooting at night. The main issue when saving JPEG files is that the dark parts of the image will be too dark and the bright lights are often overexposed. So when comparing it to a raw photo sequence which allows you adjust exposure and contrast much better in post you can see that the raw photos reveal much more details that are otherwise lost in the shadows or highlights when saving it as JPEG files. Another thing we like to fine tune is the white balance because street lights are often different which can either mean the color temperature will be too cold or too warm and the tint is just as important as the Kelvin value to make sure the image isn’t looking too green or magenta.
Below is a timelapse film we published two years ago. The video features day and night timelapses. Some scenes were shot with motorized gear such as a slider and a motion controlled head:
The high resolution of the DSLR and mirrorless camera photos also allows to crop and adjust the angle and position of the sequence even when creating a 4K video. By using keyframes the timelapse can be animated easily and the shot can look more interesting than when just leaving it static. You could for example animate a zoom or simply simulate a tracking shot with a few clicks.
Even though it’s not always fun waiting in the freezing cold for a timelapse to finish the results are often worth the wait!
The video below is a tutorial on how we made the timelapse/hyperlapse film Frankfurt Moving 2:
Written by Moritz Janisch on January 6, 2018