In January 2015 we released our first Ultra HD timelapse film FRANKFURT MOVING which has been watched 200.000 times in the first week of its release. You can check out the film below if you haven’t seen it yet and read a blog post about the production HERE!
To no surprise we received a lot of questions regarding timelapse photography so we decided to finally put together a video tutorial on “how to make a 4K timelape film”. Even if you’re working in 1080p this video should be helpful.
The most important thing to understand first is that the best way to shoot timelapses is the stills mode. Capturing raw images gives you way more freedom in post than when shooting compressed video and speeding it up in the editing software. And even if your camera can record raw video the timelapse mode would probably be the better choice to save some hard drive space.
While checking the light and weather, planning and preparing each shot is very important, the post production is where it all comes together. The best workflow is to first edit the raw files in Adobe LightRoom or CameraRaw and then import each timelapse as a separate sequence into After Effects. Since there is a pause between capturing each photograph you will end up with some minimal movement and light changes. To stabilize we use the Warp Stabilizer which is also integrated into Premiere Pro CC. To deal with the flickering we highly recommend using a deflicker plugin like GBDeflicker.
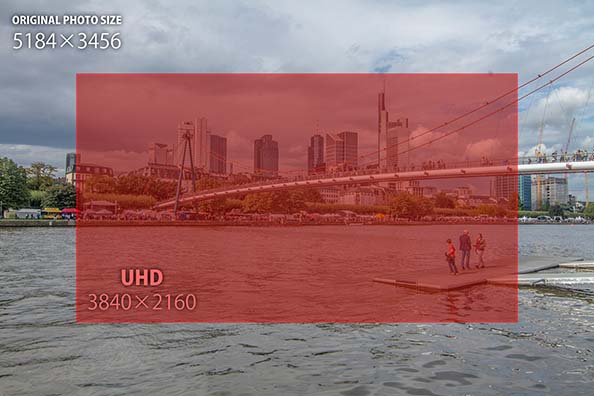
We mostly shot the timelapses with Canon DSLRs which gave us more than 5.000 pixels to work with in an Ultra HD (3840×2160) timeline. That allowed us to adjust the framing. Below is a chart that shows the regular UHD resolution and the original resolution captured with the DSLR.
Check out our recommended Camera and Gear!
Written by Moritz Janisch


